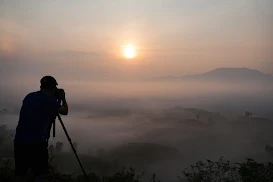
"Al Cabri: Using Tripods & Stabilization – The Key to Sharp, Low-Light Photography"
The Key to Sharp, Low-Light Photography
 |
Don't miss that moment.it won't come back! |
Tripods and stabilization methods are invaluable tools in a photographer's arsenal, particularly when striving to capture sharp images in challenging conditions, such as low-light situations. In this blog post, we will explore the benefits of using tripods and various stabilization techniques to achieve clarity and sharpness in your photos.
The Benefits of Tripods:
Stability: The primary advantage of using a tripod is the stability it offers. It eliminates the camera shake that occurs when handholding, resulting in sharper and more detailed images.
Long Exposures: In low-light conditions, you often need longer exposure times to capture sufficient light. A tripod is essential for holding the camera steady during these extended exposures, preventing motion blur.
Precise Framing: With a tripod, you can compose your shots meticulously and maintain the same framing between multiple exposures, making it easier for techniques like HDR and panoramic photography.
Flexibility: Tripods allow you to adjust the height and angle of your camera precisely. This flexibility is especially useful in architectural, landscape, and macro photography.
Image Stabilization (IS) or Vibration Reduction (VR): Many modern lenses and cameras feature IS or VR technology. This built-in stabilization helps reduce the effects of hand tremors, allowing you to shoot at slower shutter speeds without introducing blur.
Optical Stabilization: Some lenses have optical stabilization mechanisms that can compensate for camera shake. It's particularly useful for telephoto and zoom lenses.
Gimbal Stabilizers: Gimbal stabilizers are essential for videographers and photographers capturing action shots. They provide smooth, shake-free footage when tracking moving subjects.
Monopods: Monopods offer more mobility than tripods and can provide extra stability when shooting in challenging conditions. They are often used by sports and wildlife photographers.
Tips for Using Tripods and Stabilization:
Invest in a Quality Tripod: Look for a sturdy, lightweight tripod that suits your shooting style and needs. A good tripod is an investment in your photography.
Choose the Right Height: Adjust the tripod to a comfortable shooting height to avoid back strain and ensure precise framing.
Use a Remote Shutter Release: Minimize the risk of introducing vibrations when pressing the shutter button by using a remote release or a timer.
Lock Up the Mirror: In some DSLR cameras, the mirror movement can cause vibrations. Enable the mirror lock-up function if your camera supports it.
Be Mindful of Ground Stability: Ensure the tripod is set up on solid ground to prevent wobbling during exposure, especially in windy conditions.
Stabilize the Tripod: Weigh down your tripod with a sandbag or hang your camera bag from the center column to increase stability.
Stay Still: When shooting with a tripod or stabilization, remain as still as possible, especially during long exposures. Avoid touching the camera or tripod.
Using tripods and stabilization methods is essential for achieving sharp images, especially in low-light conditions. They provide the stability and support needed to capture long exposures, maintain precise framing, and reduce the effects of camera shake. Whether you're shooting landscapes, astrophotography, or any other low-light scenario, these tools will significantly enhance the clarity and quality of your photographs, there are several sizes to fit your needs, I always bring my compact tripod along, it's a good practice and way better to have it than being unable to capture unforgettable moment.
Happy Shooting!
Al Cabri.


Comments
Post a Comment